Getting started
How Pennyweight thinks about pricing, and the order to set things up so the numbers reflect your shop. Start here, then branch into the section guides.
3 min read · Updated May 05 2026
Pennyweight is a pricing engine. Every price you see (retail, wholesale, custom-channel) is computed live from three things: the components on the piece, your pricing strategy, and the live spot price. Nothing is stored as a number. When gold moves overnight, every price in your catalog reflects the new spot before your morning coffee.
This guide is a hub. It covers the order to set things up, then points you into the section guides for the parts of the app you'll actually use.
Start with Strategy, not products
The Strategy page is the baseline that underpins every price the app shows you. Hourly labor rate, markup, channel percentages, margin target, overhead. All of it lives here, all of it shop-wide. Set these once and every product you add inherits the values.
Strategy is also where you set the defaults that any individual product can override. A custom commission with unusual bench time can carry its own labor rate; a statement piece can use a different markup. But the override only makes sense if there's a baseline to override, and the baseline lives on the Strategy page.
→ Strategy guide: labor rate, markup, channels, margin target, overhead, and how each lever shows up in the per-piece breakdown.
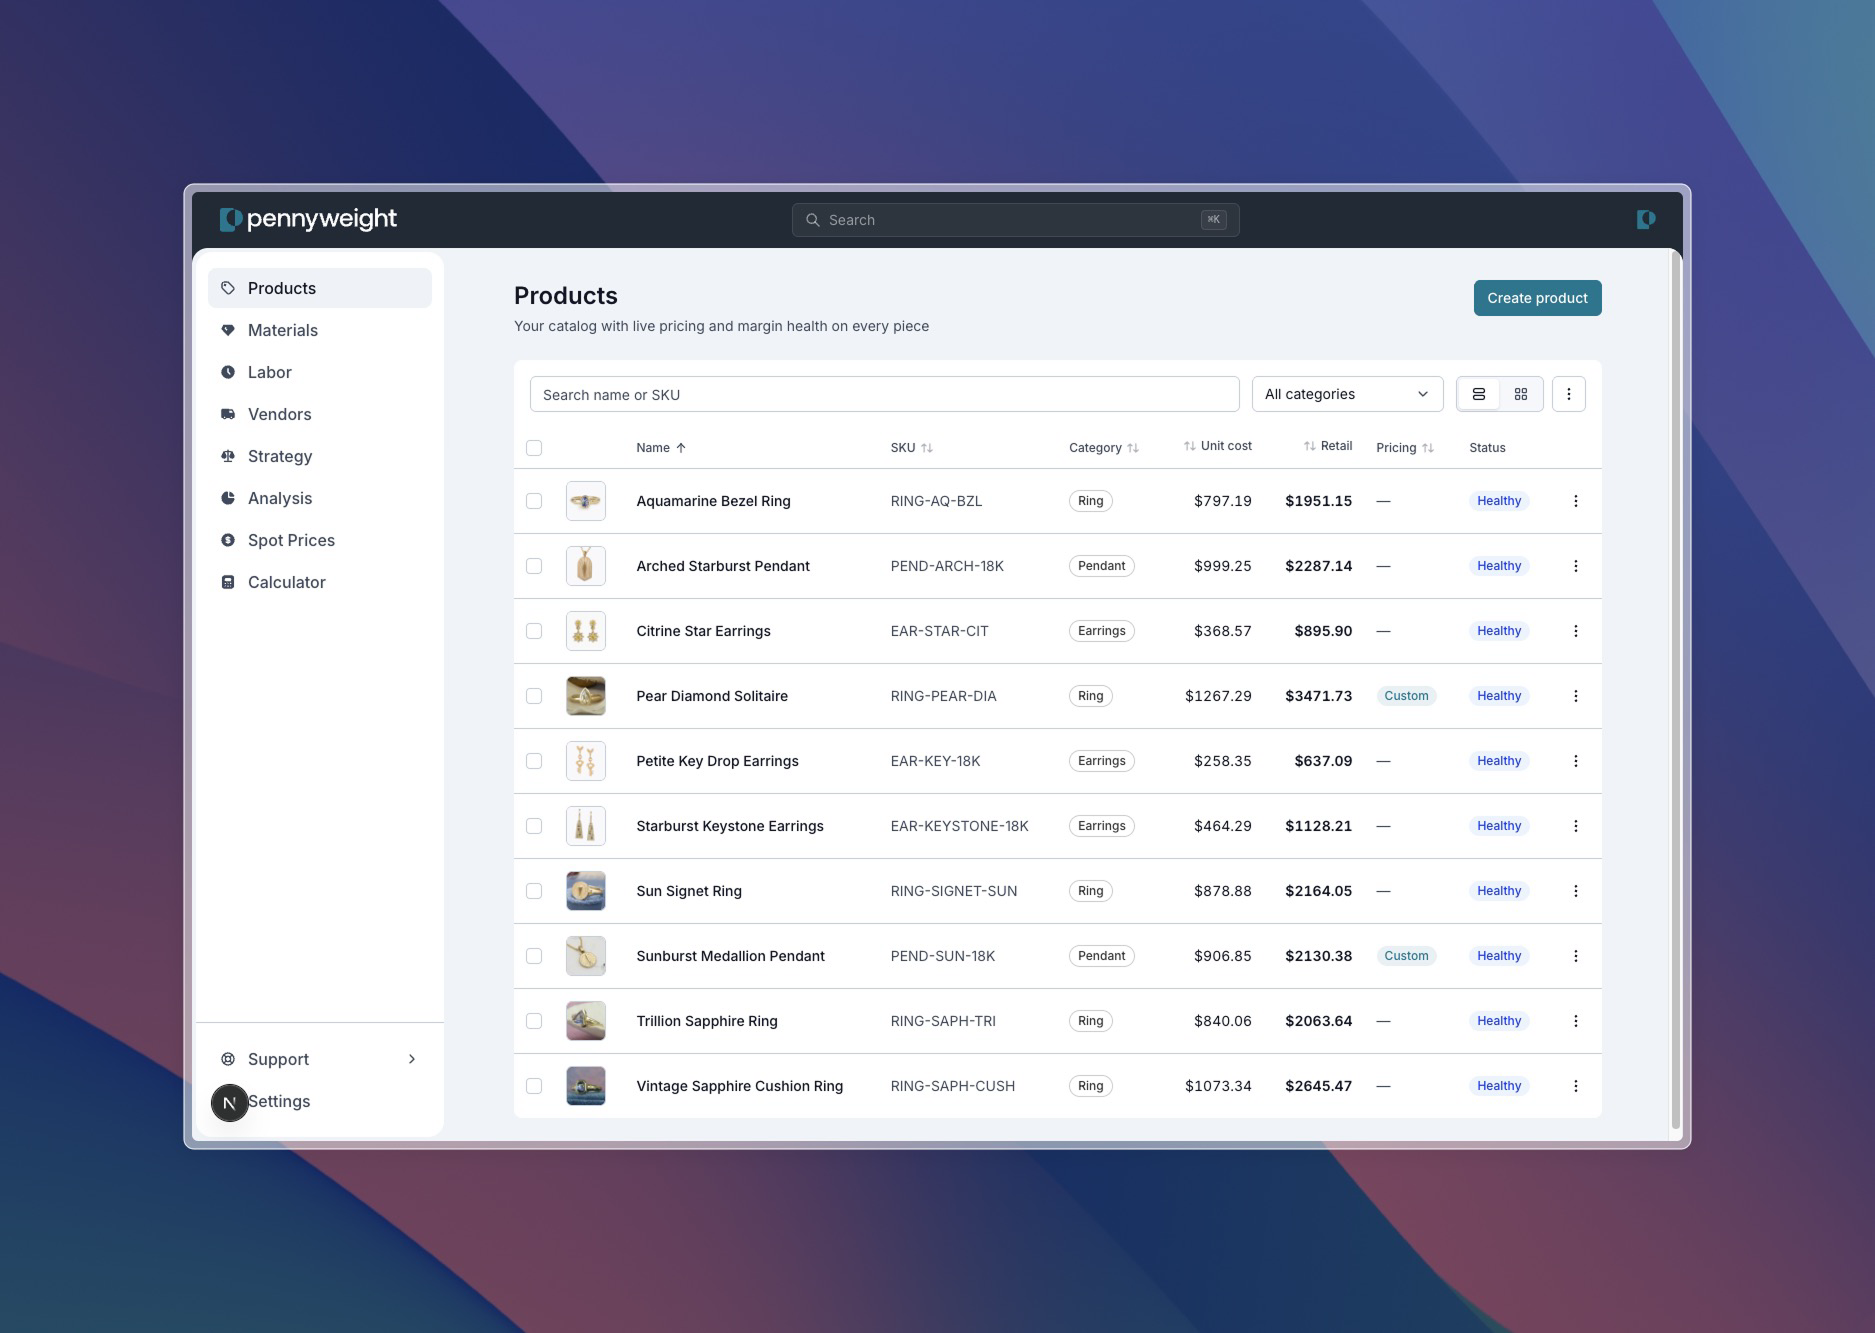
Then build a product
Products is where the real work happens. Add a piece, pick the components, add a labor line. Pennyweight computes the retail price, every channel price, and the full breakdown in one view.
The fastest way to feel how the engine works: rebuild a piece you've already priced somewhere else and compare the numbers. You'll either confirm what you already charge or find that the market has moved out from under your old price. Both outcomes are useful.
Materials and labor build themselves
You don't need to "set up your materials library" before you start adding products. The libraries grow naturally as you build pieces:
- Need a new metal? Add it inline from the product page; it lands in the materials library.
- Found a stone you'll use twice? Save it to materials so you can pick it on the next piece.
- A new operation worth tracking? Save the labor line to the library and stamp it across pieces.
Most jewelers end up with 30–80 materials and 10–20 labor entries after a few months of use. None of it has to exist on day one.
→ Materials guide: library mechanics, naming, and when to make a library entry vs. add ad-hoc.
Look for the field notes
Throughout the app you'll see small pills with an open-book icon next to section titles and input labels. They sit quietly until you need them: hover one and the label expands to "Field note"; click and a short popover opens with an explainer for that field and a deep link to the full guide on this site.
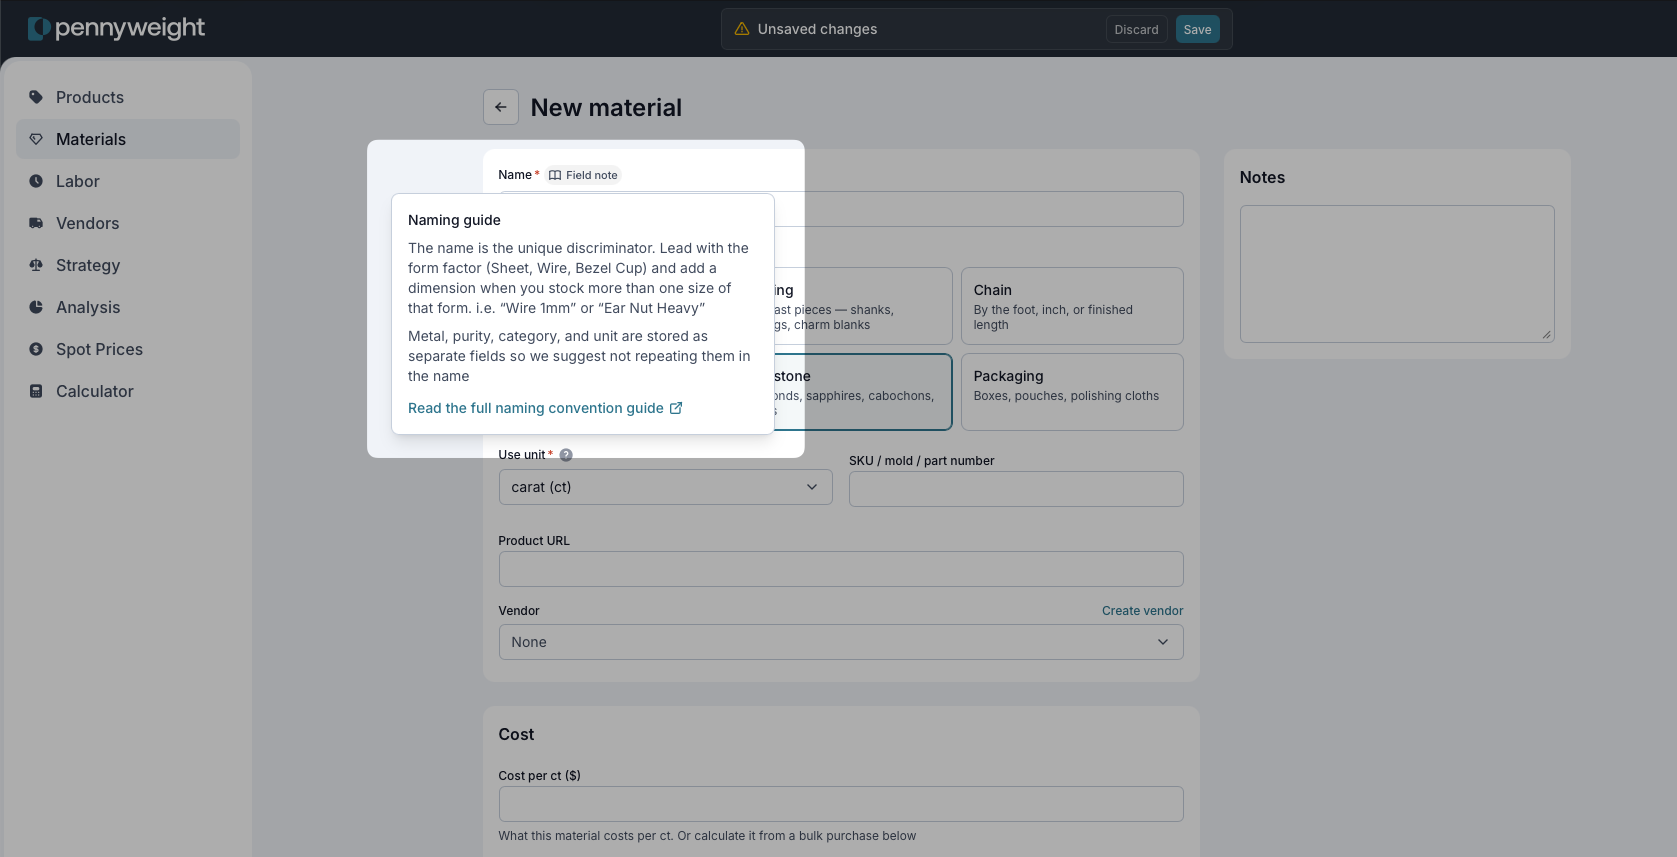
Field notes are how the app teaches itself as you go. You don't have to remember what overhead percentage means or how a 3× markup compounds. Open the note on the row you're filling out and the explainer is right there. If a field looks unfamiliar, the book icon is the first thing to click.
What to read next, in priority order
- Strategy: the baseline every price inherits from
- Materials: library mechanics and the library-vs-instance distinction
- Spot prices: what the live data does and why no price is ever stored
- Channel pricing: wholesale, consignment, and distributor pricing as percentages of retail
Add a piece, look at the breakdown, and the rest will follow.


